Showing posts with label Side Course. Show all posts

Thursday 12 June 2014

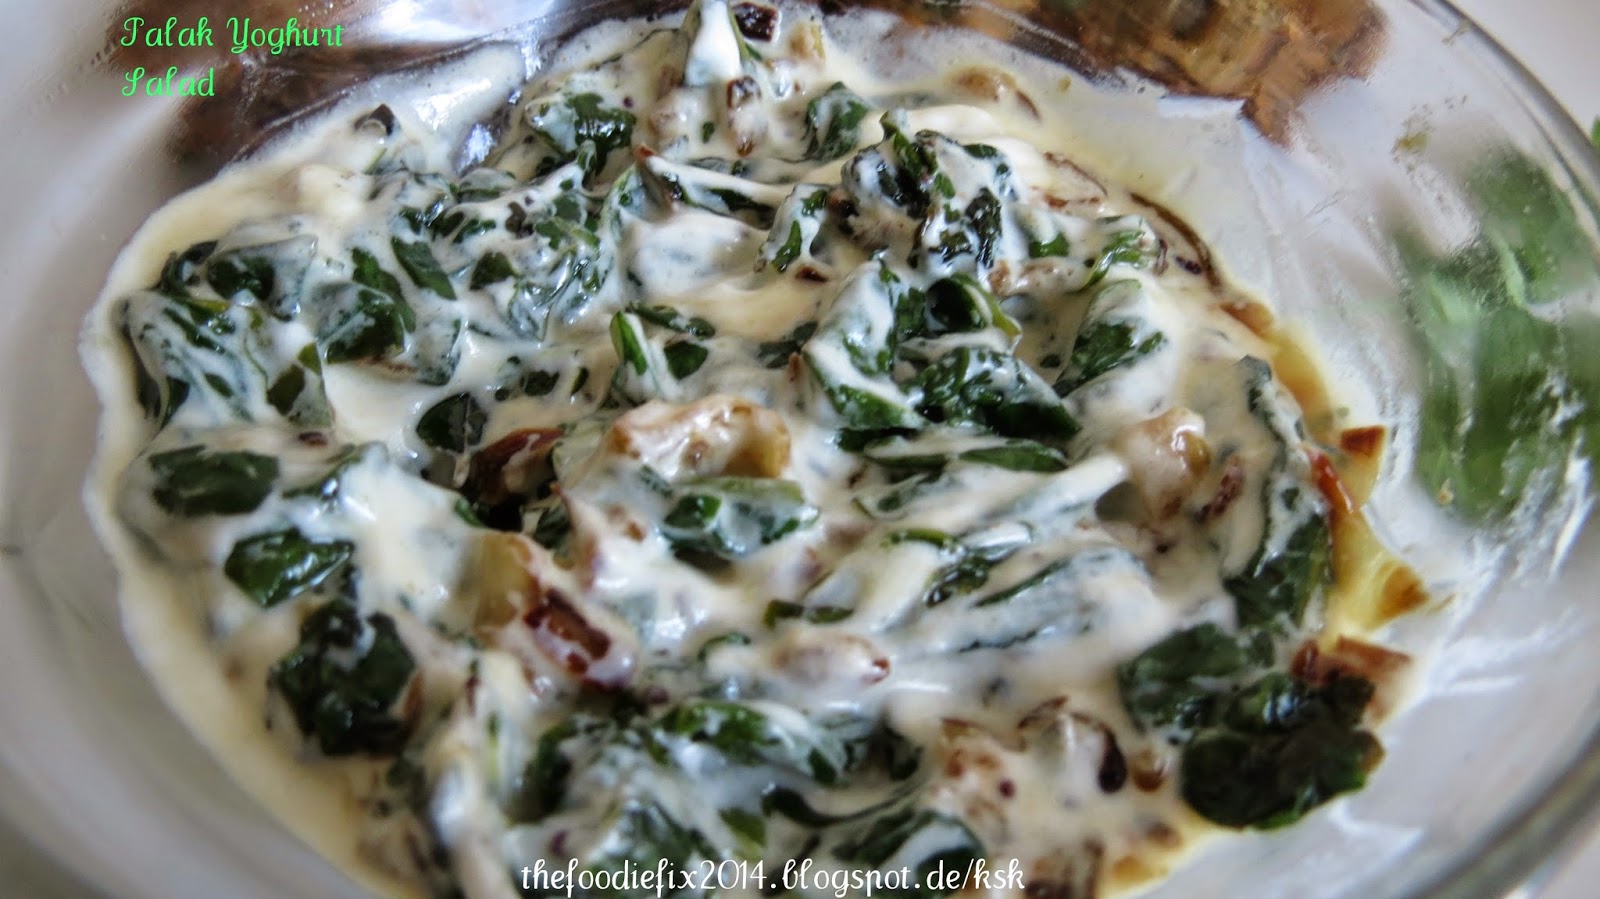
Spinach Yoghurt Salad/ Palak Curd Salad

Spinach Yoghurt Salad/ Palak Curd Salad


Serves 4 to 6

  • 3tablespoons olive oil
  • 1tablespoon freshly grated ginger
  • 4pieces garlic, pressed
  • 2teaspoons cumin
  • 1Medium onion, diced
  • 3cups very finely chopped fresh spinach
  • 1teaspoon freshly ground black pepper
  • 1teaspoon salt
  • 3/4cups low fat Greek yogurt
Spinach Yoghurt Salad/ Palak Curd Salad with Greengram Patties
  1. Heat the oil on medium heat for about 1 minute and add the ginger and the garlic and saute lightly for a minute until begining to turn fragrant and pale golden.
  2. In a small skillet add the cumin and heat for about 1 minute until fragrant. Place in a mortar and pestle and coarsely bruise the cumin.
  3. Add in the spinach and cook for 3 minutes until the spinach wilts
  4. Mix in the black pepper and the salt and mix well
  5. Beat the yogurt and add to the spinach, cook on low heat until the yogurt is warmed through, but do not bring to a boil.
  6. Turn off the heat and let the spinach rest for 15 minutes before serving.

Tomato RedChilly Chutney

Tomato RedChilly Chutney
Garlic: 25 cloves
Tomato: 3
Dry red chilli: 5 (or according to your taste)
Oil: 1tsp
Salt: needed
For Tempering
Mustard seeds: ½ tsp
Kadala Parippu: 1tsp
Urad Daal: 1tsp
Red Chilli: 1
Asafetida: a pinch
Oil: 2tbsp
Curry leaves: few


Method of Preparation
Heat 1tsp oil in a pan and add garlic cloves to it.
Sauté for 2-3 minutes and add dry red chilli to it.
Stir for a while and add chopped tomatoes and salt to it.
Close with a lid and cook in low flame till the tomato gets cooked.
Let it cool a bit
When cooled, transfer this to a blender and blend to a smooth paste.
Heat oil in a pan, splutter mustard seeds, chana daal, urad daal, dry red chilli, asafetida and curry leaves and transfer this to the prepared chutney.


Mutton Gohst/ Kadai Gohst

This is one of most popular Indian non-vegetarian curry that you will come across almost every Indian restaurant menu anywhere in the world. Much before I started blogging, I was always tempted to try these popular dishes at home, and perfecting it as possible as I could. One among them was this Mutton gosht. When I started preparing this curry dish at home, the recipe was quite different, and I was not 100 percent satisfied with the outcome. Either it was a bit to tang from the tomatoes and the curd and sometimes the lemon juice that was added in the recipe. Made it several times making few tweaks here and there and this is so far the final version that I make these days and the best that I could make. Kadai gosht also known as Karahi gosht is prepared in large woks called ‘Kadhai’ or ‘kadai’ or ‘karahi’ and hence it gets its name. The curry is normally red in colour, quite a delicious one and it’s one of the best combinations of naan bread. Whenever we get it ordered from restaurants, many a times I have also found capsicum added to it. Capsicum would’nt be fully cooked, but crunchy. And I guess that is added at the final stage of cooking to bring that flavour and hold its shape without overcooking it. I have never tried with capsicum though since the capsicum taste will overpower the taste in the dish. You may try it at home, if you love the taste of capsicum in your dish.


Here, my meat got slightly overcooked because I forgot to take into account the time that I simmered the mutton before pressure cooking it and cooked it as it should be done without sautéing. You can see that in the outcome. My meat has started breaking down from overcooking. But apart from that the curry was really good and my hubby even asked me if it was Mutton Kadai even before I told him that it was. It pairs the best with butter naan, or simply plain naan and may be served along with rice, tandoor roti and even chappathis along with plain curd, raita and pickle.
Mutton Gohst/Kadai Gohst


Ingredients:

½ kilo lamb meat cut into 2 inch chunks

Marinade:
2 medium onion grated (scant 1 cup, 220g)
1 Tbsp dry fenugreek leaves (Kasury Methy) crushed using fingers
3 Tbsp creamy yogurt
1 tsp garam masala
½ Tbsp minced ginger
½ Tbsp minced garlic
Salt

Others:
Mutton Gohst/Kadai Gohst
3 Tbsp vegetable oil
2 cardamoms
3 cloves
2 small pieces cinnamon stick
2 tsp Kashmiri Chilli powder
1 tsp roasted coriander powder
¼ tsp fennel seeds/aniseed
¼ tsp cumin seeds
¼ tsp turmeric powder
2 large tomatoes chopped (1 cup, 200g)
2-3 green chillies (Optional, add only if you need to give some heat to the curry)

Preparation:

1. Wash mutton pieces and drain well. Marinate lamb with the ingredients under marinade and refrigerate in a container with lid for a minimum of 4 hours or over night. (I always marinate it for one day.)

2. Bring the marinated meat to room temperature before cooking.

3. In a pressure cooker, heat oil. Add cardamom, cinnamon and cloves and sauté for few seconds till it leaves aroma. Add in the marinated meat and sauté for 10 minutes on medium heat, stirring occasionally.

4. Add chilli powder, coriander powder, turmeric powder, fennel seeds, cumin seeds, green chillies if adding and tomatoes and stir fry for 8-10 minutes until the tomatoes are cooked and the meat is smothered in thick spiced gravy.

5. Add ¾ cup water, stir well and cook till done. Adjust the salt if need be. Normally the gravy is very thick and is delicious that way. But if you want little more gravy, add few tablespoons of water. Since we already sautéed meat for sometime, it would take less pressure cooking time. So don’t forget to check in between for doneness. 

Sunday 8 June 2014

One Pot Chef's Chicken Biryani with Simple Chicken kurma by Huby

One Pot Chicken Biryani with Simple Chicken kurma
My husband is a great cook. . He spends very little time to cook and they taste really awesome. . But he leaves behind a  big mess to clean up ;) so I only make it once a month for him on a day both of us have off :) . But he loves and so ma kiddo. .

He makes all kinds of awesome food. He likes to cook healthy things from scratch. I can't even tell you what a favorite is because there are just too many!

So,finally he made this last weekend. .I have given you the ingredients and way to prepare just below. 

One Pot Chicken Biryani

Ingredients

  1. Basmati Rice / Jeeraga samba    2 cups( I used Jeeraga Samba)
  2. Onion   2 medium sized (thinly sliced)
  3. Tomato   1 no. (chopped)
  4. Green chili   3 or 4 (slit open)
  5. Ginger Garlic Paste    1 tbsp
  6. Mint leaves     1/4 cup (chopped)
  7. Corianderleaves/Cilantro    1/4 cup (chopped)
  8. Fresh Yogurt/Curd     1/2 cup (diluted to 1 cup -use the same cup which u measure rice)
  9. Turmeric Powder    a generous pinch
  10. Chilli Powder      1/2 tsp
  11. Salt     to taste
To Marinate( if Possible ;) he did it just before he was about to start, hardly 15 minutes before cooking :) )
  1. Chicken    1 lb(cut into pieces)
  2. Ginger Garlic Paste    1/4 tsp
  3. Yogurt/Curd      1 tbsp
  4. Chilli powder    1 tsp
  5. Coriander powder    1 tsp
  6. Garam Masala Powder   1/4 tsp
  7. Salt    1/2 tsp
To Temper
  1. Oil      3 tbsp
  2. Clove    4 no.s
  3. Cinnamon    2" stick
  4. Bay leaf    1 small
  5. Cardamom    3 no.s


Method
  • First wash chicken drain excess water then marinate with the ingredients given under the heading "To marinate"  and cover it and keep aside for at least 15 minutes.
  • Wash and soak rice in water for atleast 10 minutes.
  • Heat oil in a skillet/pressure cooker, add the tempering ingredients one by one then add onion, green chilli, mint leaves, cilantro sprinkle little salt and saute for 1-2 minutes.
  • Then add ginger garlic paste and saute till the raw smell leaves.
  • After that add tomato and saute till it turns soft n mushy.
  • Now add the marinated chicken, chilli powder, turmeric powder and saute for 2-3 minutes.
  • Then cook covered for 6-7 minutes or till the chicken gets 3/4th cooked.
  • And then add enough 1 cup yogurt and 2 or 3 cups of water, enough salt and allow to boil.
  • Once it starts boiling, reduce the flame and cook for 3 minutes.
  • And now add soaked and drained rice and pressure cook for 1 -2 whistles.
  • But if u are cooking in skillet/stove top, cook rice with lid closed in medium heat till 80% water absorbed
  • At this stage using a clean kitchen towel close the skillet and then close the cloth with lid and turn the heat to low and cook in DUM for 6-7 minutes.
  • That's it..Yummy & Aromatic Chicken Biryani ready. Serve hot with raita/curry/boiled eggs.

Simple Chicken Kurma

  • 2cm-piece fresh ginger, peeled, thinly sliced
  • 2 garlic cloves, thinly sliced
  • 2 teaspoons garam masala
  • 1.2kg chicken thigh fillets, cut into 3cm pieces
  • 200g (3/4 cup) yoghurt
  • 2 tablespoons tomato paste
  • 1 cup paste of Coconut and Poppy seeds
  • 60ml (1/4 cup) vegetable oil
  • 2 brown onions, halved, thinly sliced
  • Method
  1. Step 1
    Process the ginger, garlic, garam masala in a food processor until combined. Transfer to a large bowl.
  2. Step 2
    Add chicken, yoghurt, tomato paste. Stir until combined. Cover and place in the fridge for 15 minutes to marinate.
  3. Step 3
    Heat oil in a non-stick frying pan over medium-high heat. Cook onion, stirring often, for 7 minutes or until golden. Add chicken mixture. Cook, stirring often, for 15 minutes or until chicken is cooked through and starts to brown. Add coconut and poppy seeds paste. Simmer, stirring often, for 5 minutes or until warm.
Hurrraaaahhhhh!!!!!!!! u r done. .Sunday Special just in 2 hours :)

Friday 6 June 2014

Bendakai vepudu/Vendakkai / Okra Poriyal

Vendakkai / Okra Poriyal


Bendakai vepudu/Vendakkai / Okra Poriyal
Ingredients: 
Vendakkai / okra - 1 lb ( cut into


small round pieces )
Onion - 1 ( chopped )
Green chillies - 3 ( split )
Curry leaves - few
Mustard seeds - 1 tsp
Urad dhal - 1 tsp
Sambar powder - 1 tsp
Turmeric powder - 1 tsp
Oil - 1 tbsp

Salt to taste.
Method: 

  • Wash and wipe the vendaikai with a kitchen towel.
  • Cut it into small rounds.
  • In a kadai put the oil and when it is hot add mustard.
  • When the spluttering stops add urad dhal and fry till it turns light brown.
  • Add chopped onion,Green chillies and curry leaves. Fry till the onion turns brown.
  • Add vendaikai pieces and stir fry on low flame till its stickiness disappears.
  • Add sambar powder, turmeric and salt and stir well.
  • Keep it on low flame for 5 minutes.
  • Remove once well done and serve it with steamed rice.
  •  
  •  
Bendakai vepudu/Vendakkai / Okra Poriyal
Add caption

Spring onions Sambar


     Sambar is a lentil based dish popular in South India made of toor dal. Each state in South India prepares it with a typical variation, adapted to its taste and environment. Basically toor dal are cooked in pressure cooker along with turmeric powder, salt and water. After that vegetables, sambar powder, tamarind are cooked, lentils are added, allowed it to boil for sometime. Then cooked sambar are tempered with curry leaves, mustard and urad dal , finally garnish it with coriander leaves. Fresh curry or coriander leaves may be added at the very end to enhance the flavor. 

   This is a basic sambar recipe. You can use any vegetables to this sambar like carrot, brinjal, drumstick, radish, okra, mango or potato. Coming to this sambar recipe, addition of green onions or scallion are so flavorful and aromatic. Spring onion is a nutritious plant, and therefore it provides a host of health benefits to us. It is a rich source of vitamins and minerals which aids in curing the various ailments. Try this flavorful and nutritive sambar for rice or idly or dosa.
 

Spring onions Sambar

 Ingredients
   Pressure Cook
   1/2 Cup of Toor Dal
   1/4 Tsp of Turmeric Powder
   1 Tsp of Oil
   1/2 Tsp of Salt
   Pinch of asafoetida
         2 Cups of Water 
   To Temper
   3 Tsp of Oil
   1 Red Chilly (Big)
   1/2 Tsp of Fenugreek
   1 Tsp of Mustard
   1 Tsp of Urad Dal
         Few Curry Leaves
         Pinch of Asafoetida 
   To Saute 
  
         1 Bunch [6]  of Green (Spring) Onion
         3 Small Onion (Shallots)
         1/4 Cup of Sliced Red Onion
         1 Large Tomato
         2 Green Chillies
         2 Tsp of Sambar Powder
   Other Ingredients
          Gooseberry size of Tamarind
          Handful of Coriander Leaves or Cilantro
          Water as needed 
   Salt to taste       
   Method
  • It is used as an appetizer as it helps digestion.
  • Prevents ovarian cancer.
  • Allicin in this vegetable is good for the skin as it protects from skin wrinkling.
  • It speeds up the level of blood circulation in the body.
  • Wash and peel it, chop the small onions and spring onions tomato into small pieces, slit the green chilly lengthwise, and finely chop the coriander leaves.
  • Soak the toor dal for 30 mins and wash it cold tap water.
  • Soak tamarind in hot water, roughly 1 cup and squeeze out the juice. Keep this aside. 
    To Pressure Cook 
  • Pressure cook the dal by adding 2 Cups of water, salt, turmeric, oil and asafoetida for 5 whistles. Turn off the stove. Keep this aside.
    Tempering and Sauteing 
  • Heat oil in a heavy bottomed pan, add all the ingredients under " To Temper "list, one by one. After mustard seeds crackles and urad dal changes color, add small onions, green onion both white and green part, sliced red onion and salt, saute this for 2 - 3 mins until it changes golden brown color.
  • Add green chillies and tomato, fry this for 1 min.
  • Add sambar powder, saute this for a min.
  • Add tamarind juice and mix well. In a medium high flame, bring it to boil for 3 mins until raw smell of tamarind and sambar powder goes.
  • Add the cooked dal, bring it to boil, add chopped coriander  and cover the pan with a lid and simmer it for 5 mins. 
  • Finally add chopped coriander leaves and curry leaves and turn off the flame.
  • Serve it with hot rice or any side dish of your choice.


   Tips
  • Serve it with idly or dosa or rice.
  • You can add any vegetable to this sambar to enhance the nutrition.
  • Adjust the spicy taste according to your taste buds by increasing the amount of sambar powder or green chilly.
  • You can add tempering either way that is before sauteing the veggies like I did or at the end.
  • If you use ghee, sambar would be more flavorful and tasty.  


    Health Benefits of Sping Onion / Green Onions   

  • Spring onion lowers the blood sugar level.
  • Good source of vitamin A, B, C, k, minerals and flavanoid antioxidants.
  • It is a support against gastrointestinal problems.
  • It is often used as a medicine for common cold.

Yam Fry /Senai Kizhangu / Karnai kizhangu varuval

Senai Kizhangu / Karnai kizhangu/ elephant foot yam , it goes on . Huby and my daughter loves this yam which ever way it is prepared.  There are many ways to prepare this yam,. This is used in most of the Kerala recipes like Avial, Masiyal and many more.

                 Cleaning is a must in this vegetable. I actually clean it  four to five times in water. the outer skin is hard and irritable. so remove it first with a bigger knife. It cause some itching sensation in the hands. Many people are allergic to this veggie, so allergic people do not try this recipe. Many people love this veggie like me. I Know two types of varuval in  yam. I learn one type from my mom and other from my mom in law. Now im posting my mom in laws recipe. This recipe source is my MIL.  This is shallow fried in the heavy bottom  tawa.  The main taste maker in this yam fry is tamarind juice. Here we go top the recipe.


Ingredients: 


Yam Fry /Senai Kizhangu / Karnai kizhangu varuval
250 grams Yam

1 tspn Chilli Powder

1/2 teaspoon Coriander powder

1/4 tsp Turmeric powder

Garlic 3 flakes -chopped

1/2 teaspoon Cumin

1/2 teaspoon Garam masala

Salt to taste

Oil for frying


Method :


     1.Remove the outer skin of the yam and wash it

     2.Cut yam in medium square pieces -thick 1/2 inch.

     3.Heat enough water with 1tspn coconut oil and salt..Add
      the sliced yam and parboil (Half cook). Drain the water.

     4.Spread the boiled yam in a plate and add the other
      ingredients except oil and mix until the Yam is
      coated well

     5. We can add crushed garlic along when you mix the
      powders.

     6.In a frying pan pour 2 tbsp oil and fry this yam pieces
      till golden brown colour.

     7.Simmer and allow the cubes to cook for 10 minutes or
      until they become crispy.

     8.Transfer to a serving dish and serve hot.

     9.Mix some coriander leaves or fried curry leaves.

Green Chicken Drumsticks


So, the other day when my LO got some chicken legs from Saray market(a turkish shop), I thought of making some grilled chicken legs as an accompaniment to a glass of lemonade. Instead of making plain tandoori chicken I thought of giving the chicken a coriander flavor.. It took longer than I expected to cook- but once cooked, the chicken was soft and delicious. We were out of lemon, but I’m sure some lemon juice on top would have made an excellent appetizer. And the glass of chilled lemonade well it was the icing on the cake!
P.S: This post was written more than a week back, but due to no internet connection for the past few days and the fact that I had been travelling I have not been able to post it till today. Not that anybody cares, or do they???Hmmmm……
Green Chicken Drumsticks

Ingredients
  • 10 cloves garlic
  • 1 inch piece ginger
  • 1 tsp roasted cumin seeds
  • 6 tbsp yogurt
  • 6 tbsp oil
  • Juice of a lemon ( I used 1 tsp chilli vinegar instead)
  • 4 green chillies
  • 1 bunch coriander/cilantro 
  • 1 bunch Mint
  • 9-10 strands of Curry leaves
  • 6 chicken legs
Directions
Green Chicken Drumsticks
  1. Grind together the cloves, ginger, cumin seeds and green chillies into a paste.
  2. Mix the paste and the rest of the ingredients except the chicken in a bowl.
  3. Add the chicken legs and marinate. .For better results marinate at least 4 hours or overnight in the refrigerator.
  4. Heat oil in skillet,place the chicken slowly into it. .Wait for another ten minutes till the chicken turned brown. While turning on to the other side, I basted the chicken with marinade once again. ..
  5. Serve with onions and lemon wedges.

Thursday 5 June 2014

Drumstick thoku/ Murungakai thoku

Many years ago I remember having tasted drumstick thoku and quite enjoying the taste. Moreover the fact that a vegetable like drumstick could also be pickle never ceased to amaze me. Well, what got me enthused this time was a packet of lovely long drumsticks all the way from Kerala. And believe me. I am not exaggerating … each of them was close to a meter in length.An overdose of sāmbhar was surely not my idea of using those lovely succulent drumsticks so I decided to try a thoku. Reminiscing about that thoku  I had  almost a decade ago I realized that  it was from the kitchens  of Andhra. 
Drumstick thoku/ Murungakai thoku

Ingredients 
Drumsticks: about 4 cups (cut into 2 inch long pieces)
Chilli Powder: ½ cup
Gingerly /Sesame seed Oil: 1 cup
Salt: to taste
Turmeric Powder: 1 teaspoon
Tamarind Pulp:  a large lemon sized ball
Onion: Finely Chopped 1 cup
Tomato: finely chopped 2 cups   

Seasoning 
Mustard Seeds: 2 teaspoons
Fenugreek seeds: 1 teaspoon (dry roasted and coarsely ground)
Asafoetida: ½ teaspoon
Whole Dried chilies: broken 10 nos
Garlic: 8 flakes

Procedure:
Drumstick thoku/ Murungakai thoku
Wash the drumsticks, wipe them dry and cut them into 2 inch long pieces. Spread them out on the kitchen towel and leave it under the fan to dry for an hour or so.
Heat about 4 tablespoons of oil and fry the drumsticks pieces for about 5minutes. Stir them gently once in a way. Keep the lid covered initially, towards the end, take off the lid and allow the moisture to evaporate.
Once the pieces appear fried, take it out of the oil and keep it aside.
To the remaining oil, add the rest of the oil kept aside. Once the oil is hot, season it with chopped onions, chopped tomatoes,broken dry chilies, mustard seeds, asfoetida powder and garlic. Allow the garlic flakes to fry well.
Add the coarsely ground fenugreek seeds.
Turn off the fire,allow it to cool a little and then add the chilly and turmeric powder and salt.
Mix all these ingredients well and now add the tamarind pulp and place it on the stove again.
Allow it to cook till all the water evaporates and the oil starts to float on the surface.
Turn off the fire and add the fried drumstick pieces into the fried paste.
Allow it to cool thoroughly and then bottle it.
This pickle keeps for about 6 days. You could alternately tuck it away in the refrigerator if need be.

Chettinad Drumstick rasam

The most common dish with drumsticks is Sambar which is very tasty and quite common among south Indian homes.Apart from Drumstick sambar and Mulakkada Masala(which are our family favorites) this drumstick rasam is also quite regular at our home.The flavor from the drumsticks adds a nice punch to the rasam which makes it tastier.This rasam is not quite common even among south Indians and hence I wanted to share the recipe for those who are not familiar with it.
 Chettinad Drumstick rasam
 Chettinad Drumstick rasam


Ingredients
1-2 Drumsticks, tender and fleshy ones
1 Tomato, quatered
1/4 cup Tur dal
a lemon sized ball of Tamarind or 1 tsp tamarind paste

Salt to taste
1/4 tsp Turmeric powder
1/4 tsp Mustard seeds
1/4 tsp Jeera seeds
1-2 Red Chillies (dried)
a pinch of Hing
a few Curry Leaves (kadipatta)
Oil or Ghee for frying
A few Coriander leaves, chopped fine


To grind :
1 tomato
1/4 tbsp jeera(cumin)
 Chettinad Drumstick rasam
 Chettinad Drumstick rasam
1/4 tbsp Pepper
2 cloves garlic
Method:
Pressure cook the tur dal till it’s soft (3-4 whistles)
Soak the tamarind in 4 cups water and strain the juice
Pour this juice in a vessel and add the tomatoes, turmeric powder, rasam powder and salt. Keep on gas in medium flame.
Boil the drumsticks seperately till cooked.
Remove the insides of the drumsticks and put it in the tamarind water mixture.
Bring the whole mixture to a boil.
Add the tur dal and the ground paste boil on medium flame for 5-6 mins.
Season with mustard, jeera, hing, red chillies, curry leaves & ghee (you can season in oil also).
Garnish with coriander leaves and lemon juice, serve hot with rice.
Note: You can soak vadas to the rasam and eat it as “Rasa Vadai”!

250th recipe-Chettinad Chicken Masala


Chettinad is a small region in Tamil Nadu famous widely known for its delicious cuisine which very well reflects the authentic flavors of South India. People from almost all around the world have become fond of all the Chettinad recipes specially the non-vegetarian dishes. Kara kulambu, a spicy and tangy tasting vegetarian curry is another specialty of this cuisine. Luckily my neighbor is from that region and I have learnt some basic recipes from her which I'll be sharing with you later. I gotta post my beetroot coconut masala/beetroot pirattal recipe, it was one special recipe that she taught me. But today's recipe is from my Mom who learnt it from a recipe book she had. I love this preparation not only because it is chicken, but also because of the flavors. This Chettinad chicken masala is a dry version and has awesome flavors due to the addition of fennel seeds, cumin seeds and peppercorns. The masala powder made from these spices makes it too good and dry roasting these spices before grinding helps bring out the aroma and flavors very well. Goes well as sides with variety rice like pulao, biryani, fried rice, dal rice, sambar rice and also with chapatis and rotis. Lets see how to make this hot chicken masala. Try it out and let me know how you liked it. And thanks Mom for this wonderful recipe, which is going to be my 250th recipe. .

Serves 4 people)
  1. Chicken - 500 grams (chopped into big cubes)
  2. Shallots / Pearl onions - 75 grams (5 onions)
  3. Ginger - 1 inch long piece 
  4. Garlic pods - 1 
  5. Dry red chillies - 6 to 8 
  6. Cumin seeds - 3/4 spoon 
  7. Coriander seeds - 1 spoon 
  8. Fennel seeds - 1 spoon 
  9. Peppercorns - 1/4 spoon 
  10. Salt - As per taste
  11. Oil - 5 spoon (Gingelly oil preferred)
  12. Coriander leaves & Curry leaves - Few for garnishing (Optional)

PREPARATION METHOD

  • Wash chicken pieces well in water and keep them aside.
  • Heat a pan or wok and dry roast the following ingredients very slightly until you get a pleasant aroma. Take care not to over roast them or burn them. 
(For Masala Powder)
1. Dry red chillies - 6 to 8
2. Cumin seeds - 3/4 spoon
3. Coriander seeds - 1 spoon 
4. Fennel seeds - 1 spoon
5. Peppercorns - 1/4 spoon 
  • After the dry roasted ingredients cools down and reaches room temperature, add them to a blender make a fine masala powder out of them and set aside. This is the authentic Chettinad chicken masala powder. You will get nearly 2.5 spoons of this masala powder.
  • Peel onions put them in a blender and make a coarse paste out of it and set aside. 
  • Also make ginger-garlic paste and set aside.
  • Now heat a pan, add oil and after it heats up add the coarsely ground onions and saute until the raw smell goes. 
  • Then add the ginger garlic paste and saute for a few minutes. 
  • Now add the chicken pieces and saute well for 5 minutes. 
  • Now add the prepared masala powder and stir well.
  • After 2 minutes pour 1 cup of water, required salt and stir well. Cook on low flame.
  • Close the pan with a lid and cook until the chicken gets cooked well. Sprinkle water if necessary and stir occasionally so that the chicken does not get burnt. Please cook on low flame. 
  • When water evaporates and chicken seems well cooked remove from flame and serve. 
  • Garnish with coriander and curry leaves if you wish.

Murungakai Pitlai ( Drumstick Brown chickpeas Curry)

Murungakai Pitlai ( Drumstick Brown chickpeas Curry)

Ingredients
                                                                         Serves 2 - 3
1.       Drumstick – 3 big
2.       Tamarind – Lemon sized ball
3.       Brown Chickpeas – 1 cup(cooked)
4.       Jaggery – 1 tblsp
 .      Turmeric  Powder – ½ tsp

To be roasted and ground

1.       Asfoetida – small piece
2.       Channa Dal – 1 tsp
3.       Black pepper – ¼ tsp
4.       Dried Red Chillies – 3- 4
5.       Grated Coconut – ½ cup

For Seasoning

1.       Coconut Oil – 1 tsp
2.       Mustard Seeds – 1 tsp
3.       Curry leaves – a few

Method

Soak tamarind in hot water for about 10 mins. Squeeze and extract tamarind juice. Keep aside.  Pressure cook chickpeas . Once well cooked and keep aside. Cut drumstick into small pieces. In a pan, add a tsp of oil and fry the drumstick pieces with a little salt for about 5 – 7 mins. .  In a vessel pour the tamarind extract; add the fried drumstick pieces, turmeric powder, salt and jaggery. Allow this to boil till the raw smell of tamarind goes and the vegetable is cooked.

For the spice paste:

Murungakai Pitlai ( Drumstick Brown chickpeas Curry)
Heat a tsp of oil, add asfoetida, allow it to fry, then add channa dal fry for a minute then add the pepper and finally add the chillies. Fry this till the Channa dal turns a nice golden color. Take this out in a plate. Fry the grated coconut for a few mins. Grind the spices with coconut to a smooth paste by adding little water.
Once the vegetable is cooked add the cooked brown chickpeas and stir well. Bring to boil. Then add the spice paste and allow to boil for about 2 mins. Add water by checking for consistency. Remove from heat.
Heat a tsp of coconut oil. Add mustard seeds. Once the seed start spluttering pour it on top of the Pitlai and garnish with curry leaves.
Nutritious drumstick Pitalai is ready. Goes well with steaming hot rice and some vegetable curry. Also try it as an accompaniment with Idly, Dosa or even Adai.